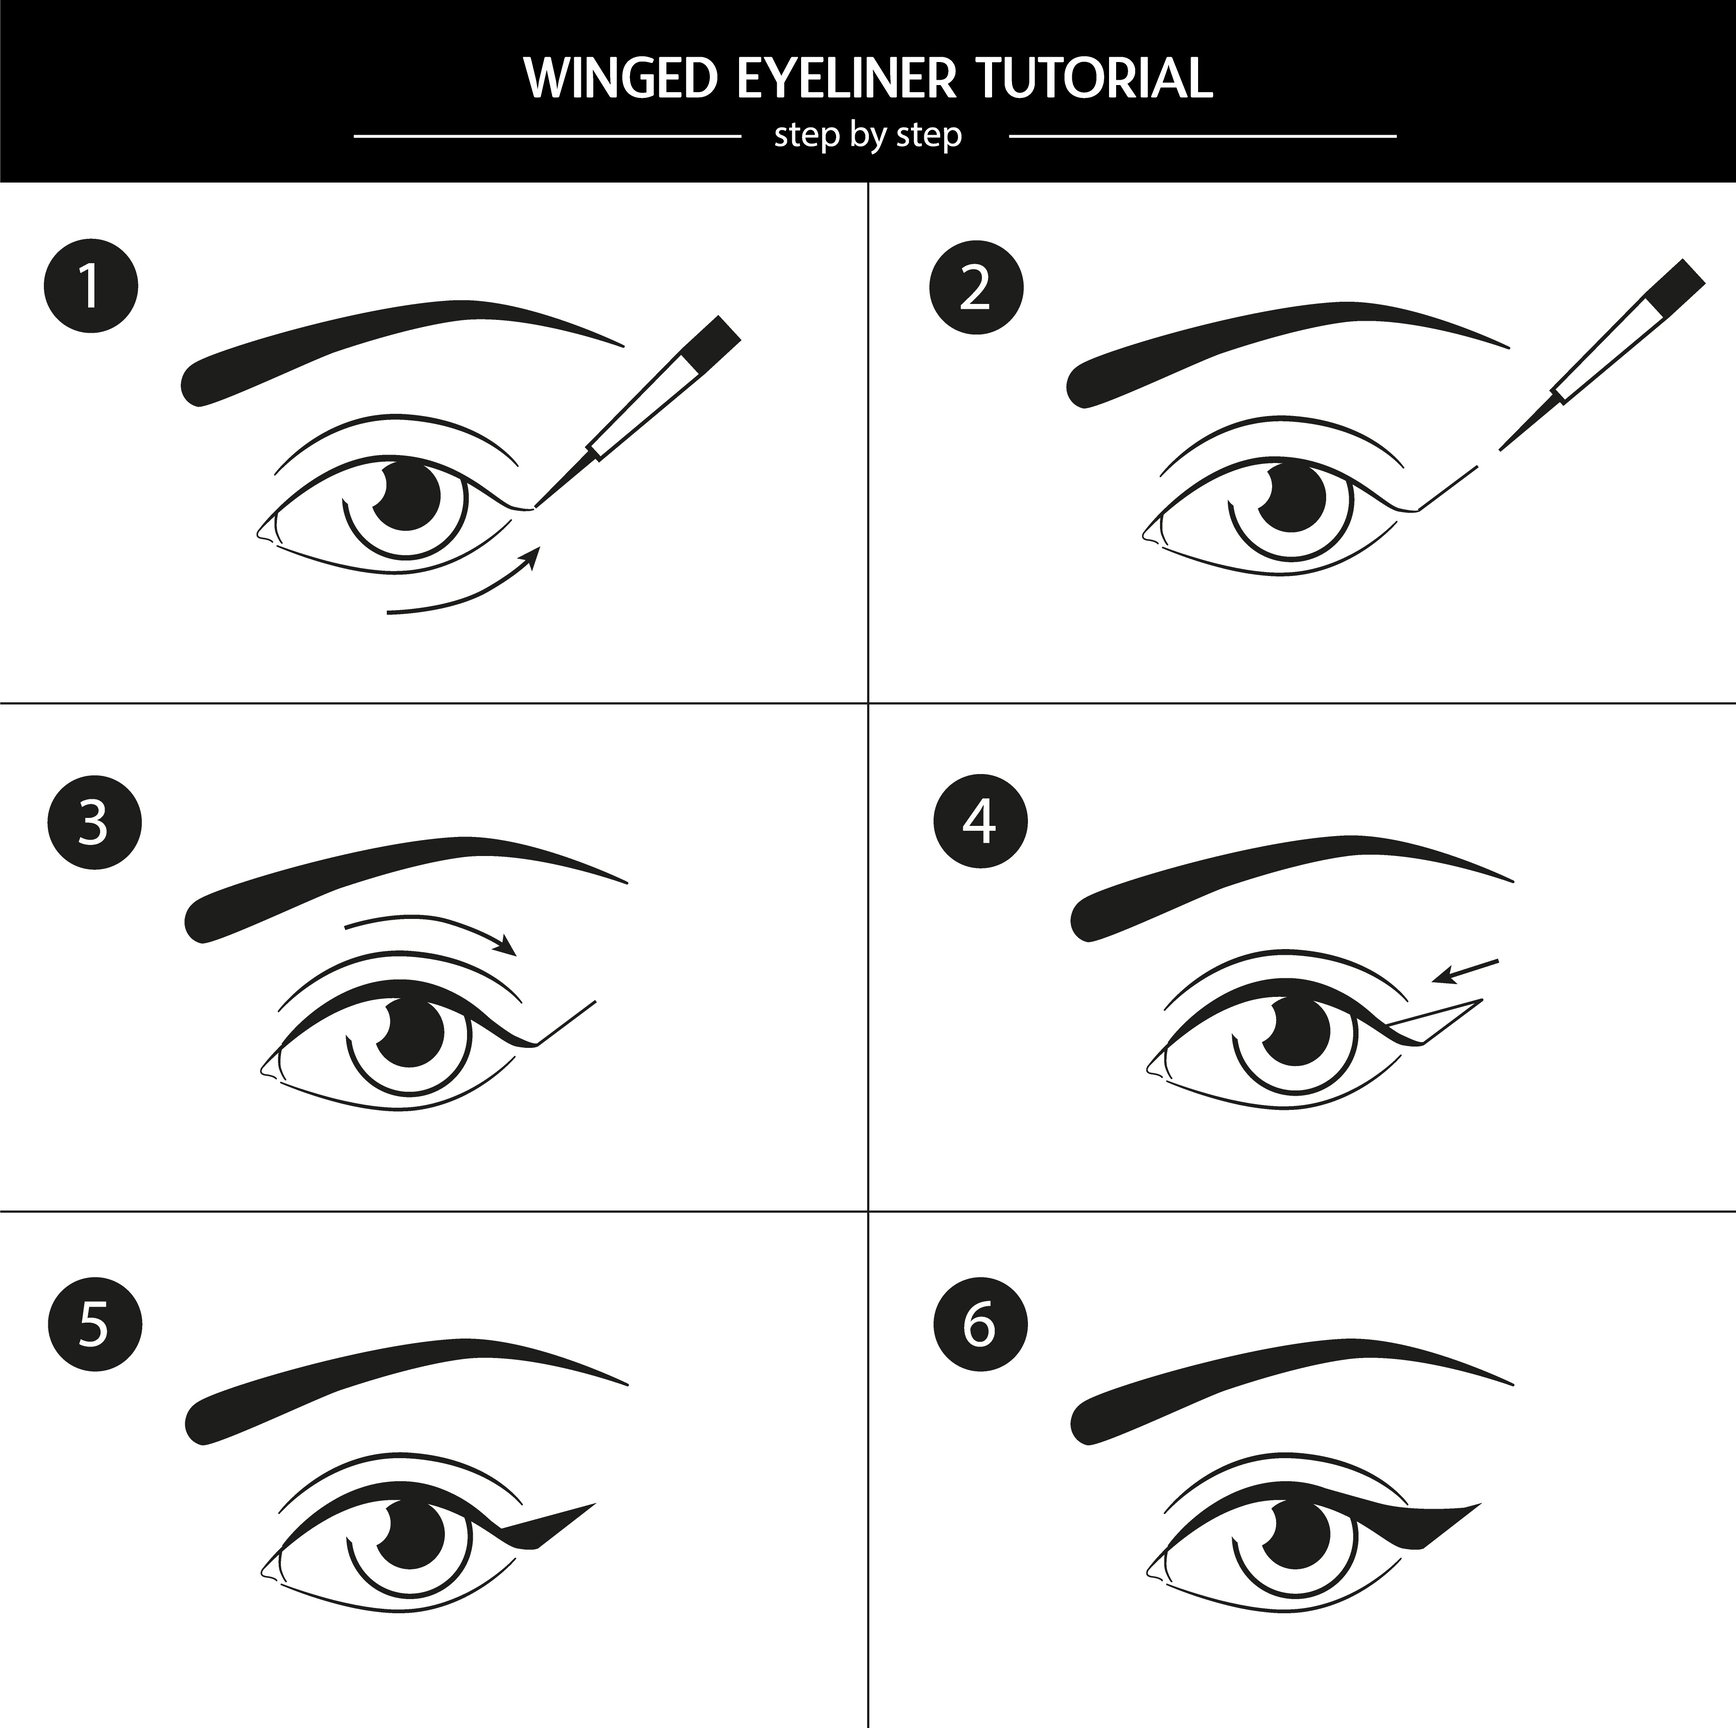
Creating a winged eyeliner look can seem daunting, but with practice and patience, it can become a quick and easy part of your makeup routine. Here are the steps to create a classic winged eyeliner look:
Start with a clean, dry eye area: Begin by ensuring that your eye area is clean and dry. Then, remove any eye makeup or residue with a gentle eye makeup remover, apply a light layer of eye cream or primer to your eyelids, and finish with a soft neutral shadow to create a clean slate.
Choose your eyeliner: Select your preferred eyeliner formula and color. Liquid eyeliners work best for creating sharp, precise lines, while gel and pencil eyeliners are better for creating a softer, smudged look.
Begin at the inner corner of your eye: Start at the inner corner of your eye and draw a thin line along your upper lash line, working outward toward the outer corner of your eye.
Create the wing: At the outer corner of your eye, draw a diagonal line upward and outward, following the natural curve of your lower lash line. The angle and length of the wing will depend on the shape of your eye and personal preference. For a classic winged eyeliner look, aim for a wing that extends slightly past the outer corner of your eye.
Connect the wing to the rest of the eyeliner: Starting from the tip of the wing, draw a thin line back down to your upper lash line, creating a triangle shape.
Fill in the triangle: Fill in the triangle with your eyeliner, making sure to connect it to the rest of your upper lash line.
Check for symmetry: Check that both wings are even and symmetrical. If needed, use a cotton swab dipped in makeup remover to clean up any mistakes or uneven lines.
Apply mascara: Finish the look by applying mascara to your upper and lower lashes.
Now practice, practice, and practice! You'll be able to create a winged eyeliner look quickly and confidently. Remember that making mistakes is expected, so don't be afraid to experiment and have fun!


